
Jun 23, 2026
May 11, 2026
May 01, 2026
Apr 09, 2026
B4, Qingdao High-Tech Zone, No. 17 Songyuan Road, Qingdao.
+86 13864822549
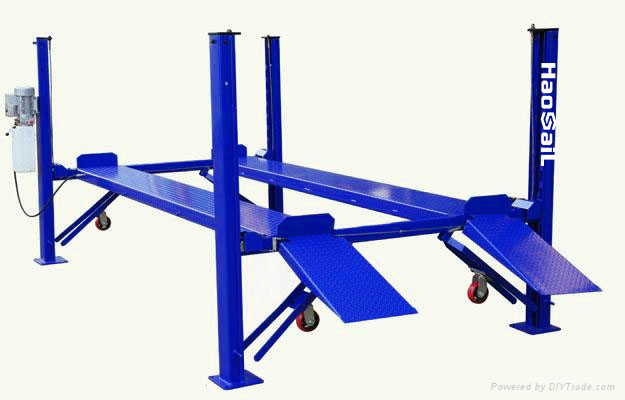
Installing a four-post Car Lift is a significant project that requires careful planning and execution. This type of lift is designed to provide stability and ease of use for lifting vehicles, making it an essential tool for both professional workshops and home garages. However, proper installation is crucial to ensure safety, functionality, and longevity. In this article, we will discuss the key installation precautions, requirements, and step-by-step process for setting up a four-post Car Lift.
Installation Precautions
1. Safety First: Always prioritize safety during the installation process. Ensure that you have the necessary protective gear, such as gloves and safety goggles. Never attempt to install the Car Lift alone; have at least one other person assist you to prevent accidents.
2. Professional Guidance: If you are not experienced with heavy machinery installation, consider hiring a professional installer. They have the expertise to ensure the lift is securely and correctly installed, minimizing risks and potential damage.
3. Read the Manual: The manufacturer’s manual is your best guide. It contains specific instructions and safety tips tailored to your Car Lift model. Familiarize yourself with the manual before starting the installation process.
Installation Requirements
1. Concrete Floor: A solid, level concrete floor is essential for the stability of the Car Lift. The floor should be at least 4 inches thick, though 6 to 12 inches is ideal. The concrete should have a minimum PSI of 3,000 to support the weight of the lift and the vehicle.
2. Space and Clearance: Ensure there is sufficient floor space and ceiling height to accommodate the Car Lift and vehicle. Measure the dimensions carefully and remove any obstacles from the installation area. A typical four-post lift requires a large footprint, so plan accordingly.
3. Electrical Setup: Most Car Lifts require a dedicated power source, usually a 110V or 220V electrical outlet. Consult with an electrician to ensure your garage’s wiring can support the lift. Proper grounding is also essential for safety.
4. Drainage and Ventilation: Ensure that the installation area is well-ventilated and free from water or oil leaks. Proper drainage is important to prevent water accumulation under the lift, which could compromise its stability.
Installation Process
Preparation
- Unpack and Organize: Carefully unpack the Car Lift, protecting components from damage. Organize the parts and tools needed for installation. Common tools include wrenches, a level, a drill, and a tape measure.
- Mark Installation Area: Use a chalk line to mark where the columns will be installed. This ensures accurate placement and alignment. Measure the distance between the columns according to the manufacturer’s specifications.
Assembling the Lift
- Base Assembly: Start with the base, ensuring it is level and secure. Use a level to check for vertical and horizontal alignment. The base is crucial for the stability of the entire lift.
- Column Installation: Position the columns according to the marks. Use the base plate holes as a guide for drilling. Secure the columns with anchors and bolts, ensuring they are tightly fastened. Double-check the alignment of each column to ensure they are perfectly vertical.
- Top Beam Assembly: Attach the overhead beams to the columns. This may require a forklift or ladders for elevation. Ensure the beams are level and securely fastened to the columns.
Installing Cables, Lines, and Hoses
- Hydraulic Lines and Cables: Install the hydraulic lines, safety cables, and power unit hoses according to the manual. Ensure they are routed correctly to avoid interference. Proper routing is essential to prevent damage and ensure smooth operation.
- Safety Features: Install safety locks and other features. Test them to ensure proper functionality. Safety features are critical for preventing accidents during use.
Installing the Lift Arms
- Placement: Attach the lift arms to the carriage. Ensure they are properly positioned and secured. The arms should be aligned with the vehicle’s contact points for optimal lifting.
- Arm Restraints: Install restraints to prevent excessive movement of the arms. This ensures stability during the lifting process.
Final Steps
- Power Connection: Connect the power unit to the electrical supply. Ensure it is properly grounded. Test the electrical connections to ensure there are no issues.
- Test Run: Perform a test run to check the lift’s stability and functionality. Inspect the movement, locking mechanisms, and safety features. Start with a light load to ensure everything operates smoothly.
- Regular Maintenance: Schedule routine checks to ensure the lift remains in optimal condition. Regular maintenance is essential for the longevity and safety of the Car Lift.
Conclusion
Installing a four-post Car Lift requires careful planning, the right tools, and strict adherence to safety guidelines. By following these precautions and steps, you can ensure a safe and successful installation. Whether you’re a professional mechanic or a car enthusiast, a properly installed Car Lift will enhance your ability to maintain and repair vehicles efficiently. For the best results, consider consulting the manufacturer’s manual and seeking professional help when needed. With a stable and reliable four-post Car Lift, you can work on vehicles with ease and confidence.


